Using Rim lighting as a gameplay cue
Table of Contents
In short
Rim lighting is one of the easiest to implement effects. It’s based on the Fresnel effect, which is the observation that the amount of reflectance you see on a surface depends on the viewing angle. You can find a good practical explanation here. I will try to keep this post as easy to understand as possible, because if you are here you are probably a beginner.
How to simulate it in a shader?
So, as I mentioned, the amount of reflectance depends on the viewing angle.
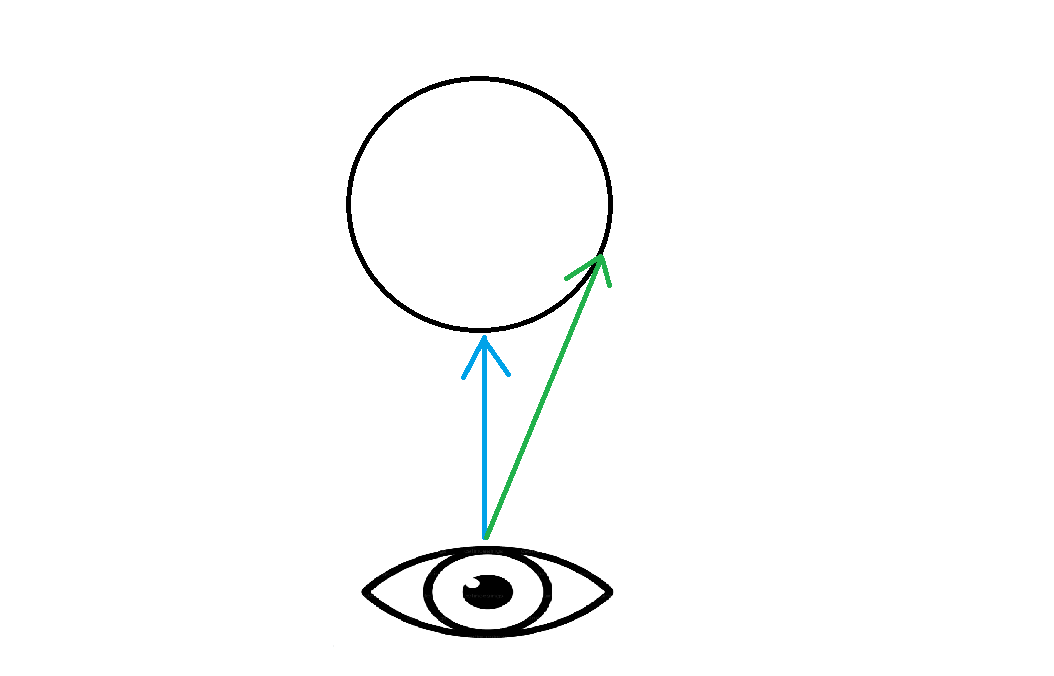 So, we have two vectors pointing at two spots on the sphere. How do we calculate the fresnel effect at each of those points?
The viewing angle is the angle between the surface and view vector. The direction in which the surface is oriented is called a normal.
So, we have two vectors pointing at two spots on the sphere. How do we calculate the fresnel effect at each of those points?
The viewing angle is the angle between the surface and view vector. The direction in which the surface is oriented is called a normal.
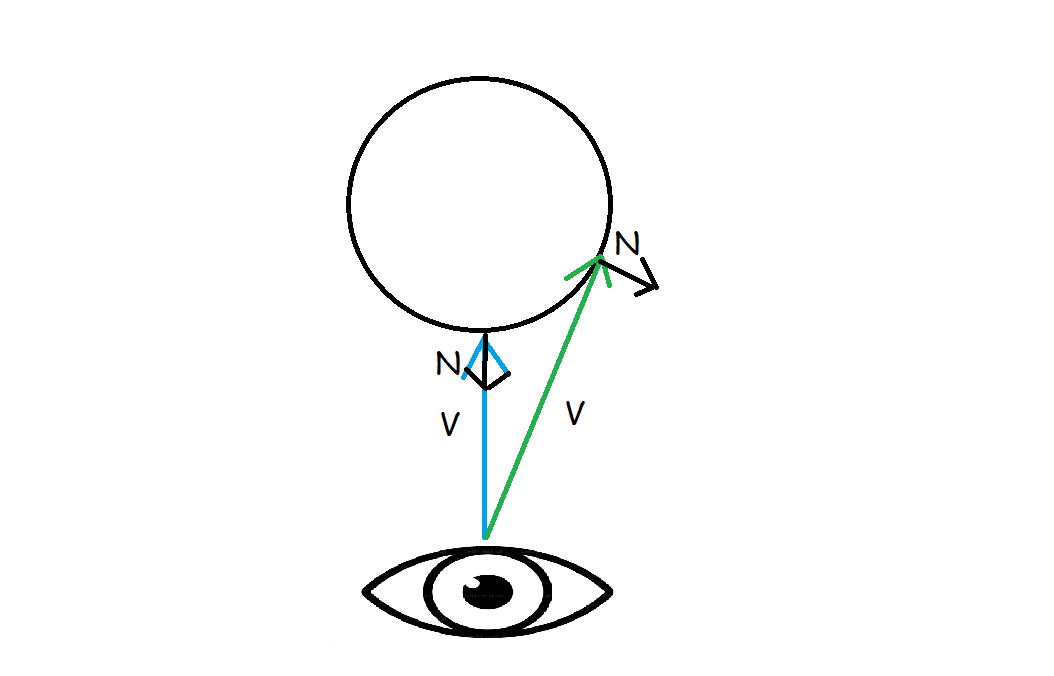
Because the reflactance is higher when the angle is steeper, it can be easily established that the pixel pointed at by the green arrow will be brighter. That’s how it should look:
We can use the cosine value of the angle between the normal and view vectors (both normalized) to get the reflectance strength. However, it would mean that the reflectance is the strongest at a 90 degrees angle (cos(90deg) = 1), so we just subract the cosine from 1.
\[ fresnel = 1 - cos(N,V) \]This doesn’t give us much wiggle room, you can’t modify it to your needs so let’s spice it up:
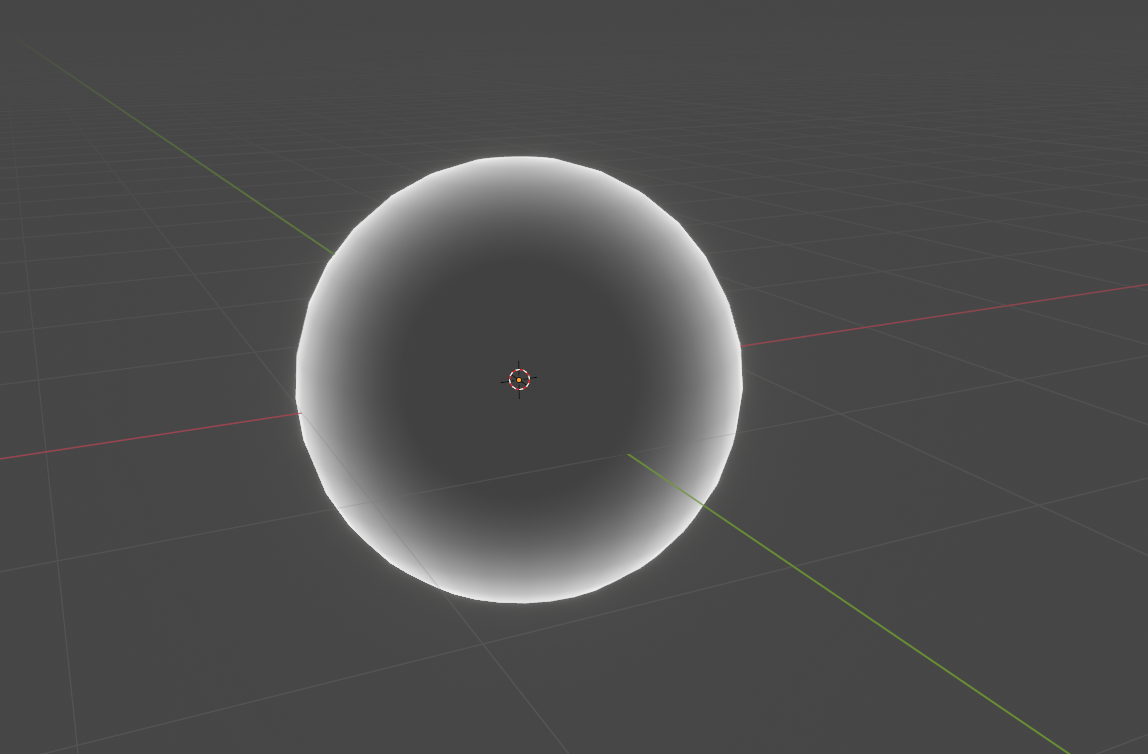
\[ fresnel = brightness \cdot color (1 - cos(N,V))^s \]Now you have some parameters! Brightness and color are self explanatory, the s parameter is the strength of the effect, best illustrated by this picture:
 Source here. The strength is lower on those objects closer to us and stronger on those far away.
Now having all that theory behind us we can write the shader
float3 glow(float3 color, float3 world_pos, float3 world_normal)
    float strength = 2.0f;
    flaot brightness = 1.0f;
    // camera pos is passed via a constant buffer
    float3 view_dir = normalize(camera_pos.xyz - world_pos.xyz);
    // You can use the dot product to get the cosine value
    // because dot(N,V) = |N||V| cos(angle)
    // Normalized vectors are of length 1, so you are left with cos(angle)
    float normal_view_dot = dot(world_normal, view_dir);
    return brightness * color * pow(1.0f - abs(normal_view_dot), strength);
And that wraps up this section!
Using it as a cue
This is a very universal shader, in case of our game, Guiding Light, it was used to guide the player to the activity we wanted him to perform. We made the object glow with different strength over time.
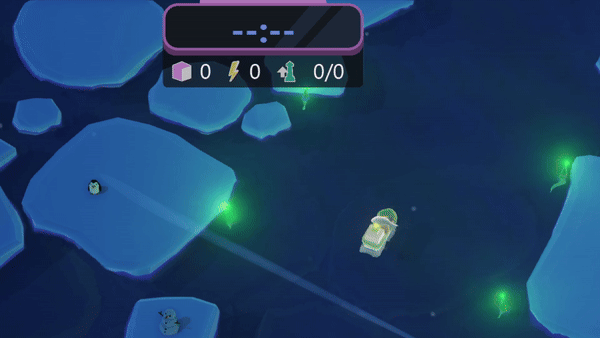
As you might expect, it’s incredibly simple to implement, thanks to our great parameters! We just need to change the strength overtime. After some tweaking I came up with:
float strength = abs(sin(time * 5.0f)) * 8.0f; // time is from a constant buffer
We also shifted the color towards yellow, artists choice:
color.b *= 0.7f;
The end
It was a quite a short tutorial, but I hope it comes in handy to at least 1 person ;) Remember, if you have any questions, you can always let me know on twitter @umbc1ok.
comments powered by Disqus